
Best tips to get a good photo of Uluru
We’ve all seen that classic shot of Uluru. The bright orange ‘loaf’ of rock rising out of the ground. A stark contrast to the deep blue sky behind it. That’s only one face of the rock. There’s a lot more of Uluru to see than people think, and many more photos you can take.
Before we get into it, please be aware of ‘sensitive sites’ around the rock. These features of Uluru hold significant cultural value to the Anangu. As such we are asked not to take any photos or video of these places. They are clearly marked by signs on the walking track and on all maps of the rock.
Sunrise
The hour after sunrise, and the hour before sunset, are called the ‘golden hours.’ This is when the light is warm and flattering, and the shadows are soft. Almost every photo will look better if taken during a golden hour. Try to make the effort to be out and about at these times, you won’t be disappointed.
It’s hard to find the motivation to get up when it’s still dark and you come out to Uluru. All that effort of getting out of bed will pay off when you see the sun rising over sand dunes. The rock will be bathing in all shades of red, orange, and yellow. At this time of the day the best photos of the sun hitting Uluru will either be taken at the sunrise viewing platform ‘Talinguru Nyakunytjaku’, or at the base of the rock. Talinguru Nyakunytjaku, translated as ‘place to look from the sand dune’, offers a unique angle of Uluru with a view of Kata Tjuta on the horizon behind it. There are many platforms on this dune. Try to get there early though to secure a spot as it gets really busy.
If you want to avoid the crowds, or want another perspective on sunrise try the southern side of Uluru. There are places to pull off the road for photo opportunities all around the rock. One of the best looks at the south side from a spot that’s not too far past the turn off to Talinguru Nyakunytjaku (if you’re driving anti-clockwise around Uluru). Sunrise from this location is a great chance to whip out your smartphone and take a panorama of Uluru, it’s an impressive shot.
If you want a more intimate, detailed shot of the rock, head to the Kuniya carpark. When the sun rises here the rock is glowing and there’s a new photo to take everywhere you look. We should know, this is where we start our sunrise tours during the summer months!
Sunset
If you’re not one for early mornings, sunset offers just as many opportunities for amazing photographs.
Firstly, there are of course the sunset carparks. One is for guests who are part of large tours, and the other is for visitors who are driving themselves around. Both offer very similar views of the Uluru. It’s from these places that you get that classic photograph that you see on all the postcards. Just make sure you get there with plenty of time to find a park and a place to stand without any bushes obstructing your view. You’ll notice the colour turning from a dull brown, to yellow, then orange, and then a deep red before finally fading to a dull purple once the sun has completely dipped below the horizon. If you have a camera with the ability to take a time-lapse, then this is the perfect opportunity to do so.
When the sunset carpark is too crowded, continue further on the road into the park and find a place to pull over. The further you drive, the more the rock deviates from its iconic shape, but you’ll certainly find a unique angle to snap a pic.
Something Different
There are a few companies out here that run scenic flights of Uluru. Scenic flights offer amazing views of the rock which certainly emphasize how big it is. A tour at any time of day is amazing. For the best photo possible you’ll need to try and get up in the air for sunrise or sunset.
Looking at Uluru from different angles can produce some lovely shots during the golden hours. If you want something really unique you’ll have to do the opposite from everyone else. Try going to the sunset viewing area at sunrise, or vice versa. This will usually result in a silhouetted Uluru against the sky. Depending on the weather and clouds there will be a subtle gradient of pastel colours. Perhaps a vibrant splash of reds, oranges, and pinks. A photo like this is of course unexpected, it showcases the colourful sky and sand dunes rather than the imposing rock, but it’ll be beautiful all the same.
People
You might find that if you’re taking a photo of someone, with Uluru in the distance behind them, that it might appear quite small because of how far away it is. A solution to this is to take four or five steps back, then zoom in on the person from there. By zooming in you’re increasing the focal length. This has the effect of bringing the background closer. The result is a much larger and more impressive Uluru. Play around with the zoom and where you’re standing, so that you can find the ideal composition.
So with all of that, I’m sure you’re just about ready to grab your camera or phone, and maybe even a tripod, and head out to Uluru to get that perfect pic. Good luck, and happy snapping!
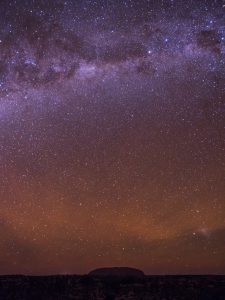
Image captured by Tom Cowey
If you want more information about how you can join Tom or one of our other amazing Segway Tour guides on a tour around Uluru, click here or alternatively contact us.